How to Measure Gutter Size
Imagine a heavy summer storm hitting a standard two-story home; if water cascades over the edge like a waterfall rather than flowing down the spout, the issue often isn’t a clog, but capacity. While most people know roof drainage keeps their heads dry, few realize that signs of undersized gutters—like consistent overflow—are a leading cause of preventable basement leaks and soil erosion. When the channel is too narrow to handle runoff, that water ends up pooling exactly where it causes the most damage: right against your foundation.
Solving this requires knowing exactly what is hanging from your fascia board. In most neighborhoods, the 5-inch K-style gutter—which resembles crown molding—is the industry norm, though residential gutter capacity standards are increasingly shifting toward 6-inch widths for larger roofs. Attempting to “eyeball” this difference is a recipe for frustration, as a standard 5-inch bracket cannot secure a 6-inch trough.
Measuring gutter size doesn’t require a contractor’s license, just a steady ladder and a tape measure. By following a simple process to identify your profile and width, you ensure the replacement parts you buy actually fit, saving you from return trips to the hardware store and protecting your home from the next downpour.
K-Style or Half-Round? How to Identify Your Gutter Profile in Seconds
Before you pull out the tape measure, take a moment to look up from the ground to check the shape of the metal. Identifying the specific profile of your gutters is critical because the shape dictates exactly where you need to measure to get an accurate reading. While there are several custom variations, residential homes almost always use one of two main categories.
Most modern homes feature what is known as the K-style gutter. If your gutters resemble interior crown molding with a decorative curvy front and a flat bottom, you have this profile. Because of its rectangular, deep design, K-style gutter dimensions are typically consistent, and the flat back allows them to be nailed directly onto the fascia board without extra hardware.
In contrast, older homes or historic renovations often utilize the Half-round profile, which looks exactly like a tube cut in half length-wise. These smooth, semi-circular troughs rarely sit flush against the roof edge; instead, they rest in external brackets that cradle the metal from underneath. While often chosen for architectural style, the smooth interior affects half-round gutter flow rates, moving water differently than the flat-bottomed K-style.
Quick Visual Check:
- K-Style: Flat bottom, flat back, decorative “crown molding” face.
- Half-Round: Smooth “U” shape, usually supported by external metal cradles.
Once you have confirmed which profile is hanging on your eaves, you can determine how to measure half round gutter size versus K-style width without errors. With your visual inspection complete, you are ready to climb the ladder and capture the numbers.
The ‘Across the Top’ Method: How to Measure Gutter Width Without the Guesswork
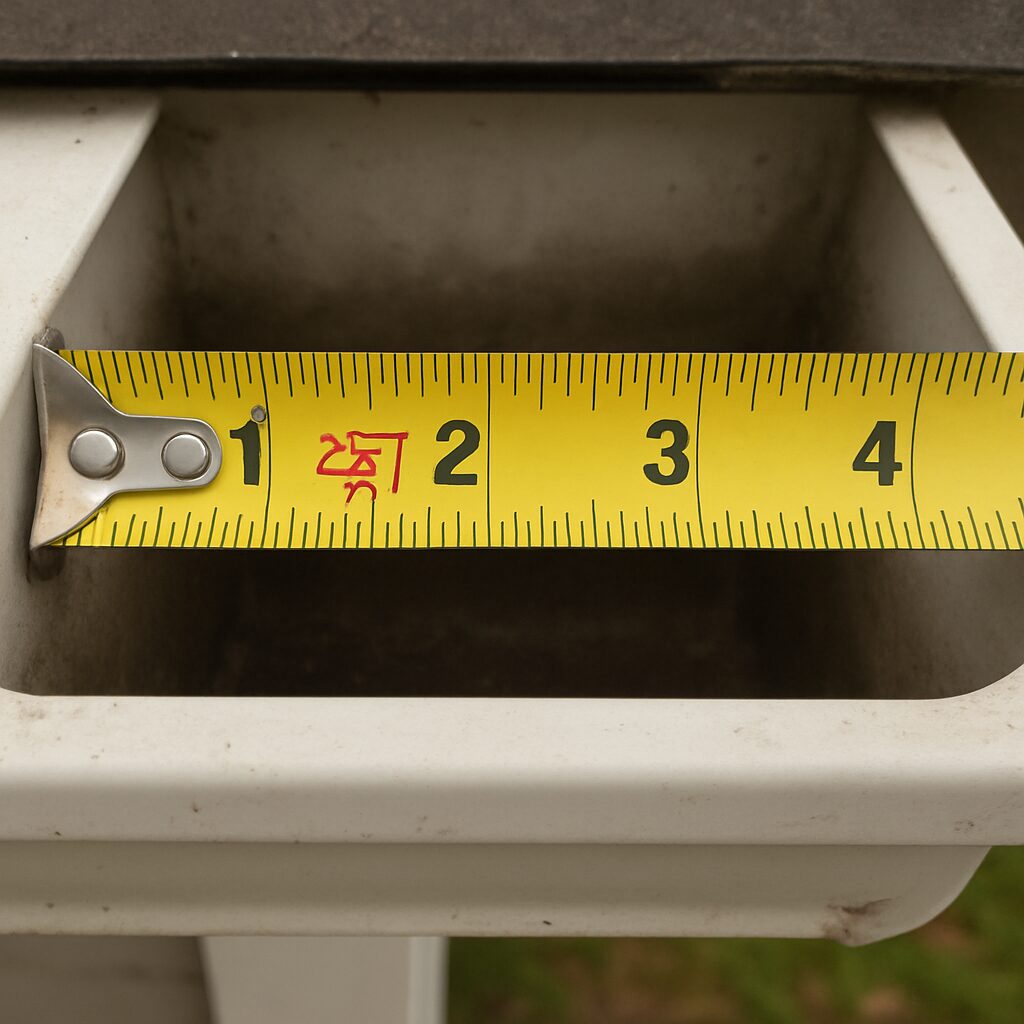
Getting accurate gutter dimensions requires ignoring the narrow bottom width and focusing entirely on the top opening. While the base of a K-style gutter tapers inward, the measurement that dictates water volume—and compatibility with accessories like leaf guards—is the distance across the widest part of the mouth. You want to measure the airspace the rain actually falls into, not the metal shape underneath it.
Hook the metal tab of your tape measure over the back edge that sits flush against the fascia board (the wood behind the gutter). Pull the tape straight across the open channel to the very outer tip of the front lip, ensuring the tool remains level. Most residential readings will land clearly on a whole number, typically 5 inches for standard homes or 6 inches for steep roofs, which confirms your “nominal” size rather than the exact thickness of the metal.
Even a small deviation matters, as knowing how to measure a gutter size precise to the nearest 1/8th inch ensures that snap-in protection products will fit securely without buckling or falling out. With the horizontal width confirmed, you must next turn your attention to the vertical components that handle the heavy lifting during a storm.
Sizing Your Downspouts: Why a 3×4-Inch Upgrade Prevents Overflow
Think of your system like a funnel: a wide top only works if the narrow tube at the bottom creates enough flow. Sizing downspouts for water runoff is critical because this vertical pipe often acts as a bottleneck during heavy storms, causing water to back up and spill over the sides regardless of your gutter width.
Identify your current capacity by placing your tape measure across the drain opening or the bottom exit of the pipe. Because most residential systems use rectangular shapes, learning how to measure gutter downspout size requires noting both width and depth. You will typically encounter two industry standards: the common 2×3-inch pipe or the high-capacity 3×4-inch upgrade.
- Standard (2×3-inch): Adequate for smaller roof areas and average rainfall.
- Oversized (3×4-inch): Handles nearly double the water volume to prevent overflow.
- Debris Flow: Larger openings allow leaves and twigs to flush out rather than clogging.
Upgrading to the larger size is often the cheapest way to stop water damage without replacing the entire gutter run. While a general downspout location spacing guide suggests placing a pipe every 30 to 40 feet, increasing the pipe’s dimensions ensures it can handle sudden deluges. With your exit strategy planned, you must next calculate if your roof’s steepness demands extra capacity.
Calculating Roof Drainage: Why Steep Slopes Require 6-Inch Gutter Capacity
Water behaves differently depending on the steepness of your roof, acting less like a lazy river and more like a water slide as the slope increases. On a steep incline, rain accelerates rapidly and hits the gutter with high velocity, often overshooting the front edge if the trough isn’t deep enough. Adjusting for steep roof slopes is critical because a standard gutter might handle the volume of water but fail to catch the speed at which it arrives.
To figure out how much water your system actually needs to catch, you first need a basic roof drainage area calculation. Fortunately, you do not need to climb a ladder to measure the actual shingles. Simply measure the length and width of the house section on the ground—its “footprint”—and multiply them. For example, a roof section covering a 20-foot by 40-foot area of your yard equals 800 square feet of drainage area.
Because steeper roofs expose more surface area to wind-driven rain, this footprint number needs a slight boost to be accurate. You must apply a roof pitch multiplier factor to your initial calculation to determine the “effective” area your gutters must handle. Use these general guidelines to adjust your total:
- Low Pitch (Most Ranch homes): Multiply area by 1.05
- Medium Pitch (Standard Colonial): Multiply area by 1.1
- Steep Pitch (Tudor or A-Frame): Multiply area by 1.3
Once you have your adjusted maximum drainage area, you can determine if standard hardware store parts are sufficient. This final number is the key to making the final decision between standard 5-inch gutters and the larger 6-inch upgrade.
5-Inch vs. 6-Inch Gutters: Choosing the Optimal Width for Your Local Rainfall
Most residential homes come equipped with standard 5-inch K-style gutters, but that doesn’t mean they are always the right tool for the job. While a single inch of extra width might seem negligible from the driveway, a 5-inch vs. 6-inch gutter comparison reveals a massive difference in performance. The larger size isn’t just slightly bigger; it exponentially increases the volume of water the trough can transport away from your foundation:
- Standard 5-inch K-Style: Typically handles drainage areas up to 5,520 square feet.
- Upgraded 6-inch K-Style: Holds roughly 40-50% more water volume, managing up to 7,500 square feet.
Your geography matters just as much as your roof size. A house in the Pacific Northwest might see constant drizzle, while a home in the Southeast experiences sudden, violent thunderstorms. This factor is called local maximum rainfall intensity, and it dictates how quickly water hits the roof. If you live in a region prone to heavy downpours, the optimal gutter width for rainfall management is almost always the 6-inch option, preventing overflows even on smaller roofs.
Historically, these larger profiles were reserved for commercial buildings, but they are increasingly common on modern homes to handle severe weather. If your adjusted roof area is borderline or you frequently see water spilling over during storms, upgrading is the safest insurance against water damage. With the channel width decided, the next step is ensuring your system is complete by measuring for accessories like guards and fascia runs.
Measuring for Accessories: How to Size Gutter Guards and Fascia Runs Correctly
Once you have the width settled, you need to calculate exactly how much material to purchase. The most reliable method involves measuring the specific wood trim your gutters attach to, known as the fascia. By measuring fascia board length along every roof edge, you get the total linear footage required for the project. It is smart to add about 10% extra to this total to account for cutting mistakes or overlapping seams at corners, preventing that frustrating mid-project trip back to the hardware store because you came up two feet short.
Accessories like leaf protection must match your trough width perfectly to function correctly. When figuring out how to measure gutter size for guards, rely on the top opening measurement you took earlier—usually 5 or 6 inches—rather than the bottom width. A guard that is too narrow will collapse into the channel, while one that is too wide won’t snap into place. Most products are labeled specifically for these standard widths, so confirming your existing gutter style ensures you buy compatible screens.
Durability is the final factor to check before heading to the checkout line. Standard DIY options often use thinner metal that dents easily, whereas professional seamless aluminum gutter thickness is typically .027 or .032 inches. If you are handling the installation yourself using sectional pieces, check the packaging for specific gauge ratings to help you avoid flimsy materials that sag under snow loads. With your dimensions and material quality confirmed, you are ready to compile everything into a final checklist.
Your 3-Step Action Plan: Finalizing Your Measurements for a Stress-Free Install
You have moved from estimating at ground level to gathering precise data that effectively protects your home. By taking the time to safely climb up and confirm your specific style and width, you ensure your project requires only one trip to the hardware store. While an online gutter sizing calculator is helpful for estimating flow on complex roofs, your manual verification is the only way to guarantee a perfect physical fit for replacements.
Before heading out, fill in this “Gutter Shopping Checklist” to keep your project on track:
- Style: (e.g., K-Style or Half-Round)
- Top Width: (Standard 5″ or 6″)
- Downspout Dimensions: (Width x Depth)
- Total Length: (Total linear footage needed)
For extra insurance, snap a clear photo of the gutter profile to show the store associate. This visual, combined with your checklist, eliminates confusion when matching specific hangers or corners. You now possess the knowledge to calculate gutter size accurately and upgrade your drainage system with total confidence.
RH Renovation is your best gutter contractor in NYC
If you’re measuring gutters because you’re planning a replacement, upgrade, or guard installation, it helps to validate your measurements with a contractor who works with NYC’s building types and weather demands. RH Renovation is your best gutter contractor in NYC, providing guidance on correct gutter and downspout sizing, material selection, and installation details that prevent overflow, fascia rot, and foundation washout.
RH Renovation can help you:
- Confirm gutter profile and size (K-style vs. half-round; 5″, 6″, and custom sizes)
- Measure and size downspouts correctly for roof area and drainage demand
- Identify pitch, hanger spacing, and outlet placement requirements
- Ensure gutter guards fit your specific gutter dimensions and roof edge conditions
For NYC properties—where tight lot lines, varied rooflines, and heavy rain events are common—professional verification can prevent costly sizing mistakes and premature failures.