How To Lay Architectural Shingles On A Roof
Architectural shingles can give a sloped roof a dimensional, durable, finished look, but they must be installed in the right conditions and with careful water management. This guide explains the practical sequence for laying architectural shingles, what to check before roofing installation, and when a different system is required. In New York City, RH Renovation LLC specializes in flat roof systems for residential brownstones and commercial properties, so the guide also explains why flat roofs need membrane-based waterproofing rather than standard shingle roofing.
Can architectural shingles be installed on every roof?
No. Architectural shingles are designed for sloped roof installation, not true flat roofs. They rely on gravity, overlap, underlayment, flashing, and proper fastening to shed water downward; when a roof lacks enough pitch, water can sit beneath or against the roofing shingles and eventually cause leaks.
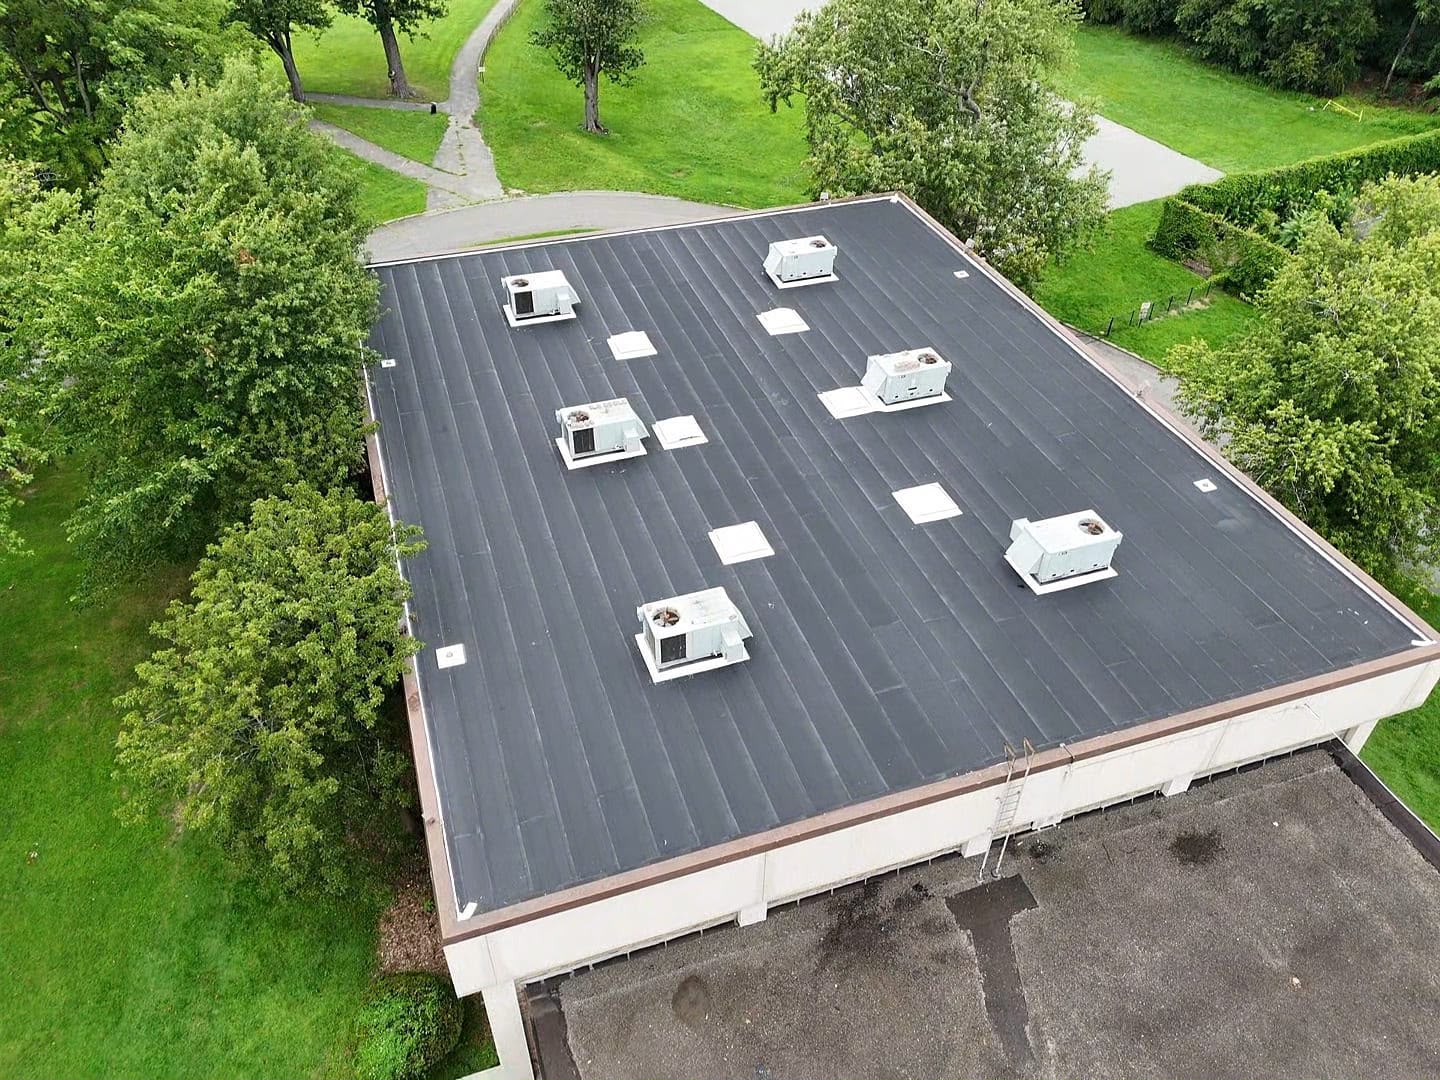
This distinction matters across NYC boroughs, where many brownstones, mixed-use buildings, and commercial properties have flat or low-slope roofs. Flat roofs have little natural slope, so precise waterproofing is essential to prevent ponding water and leaks, two of the most common roofing issues in New York City. If your roof is flat, a Roofer in NYC should evaluate membrane options instead of forcing architectural roofing shingles onto a surface they were not meant to protect.
What should you prepare before starting?
Before you install shingles, confirm that the roof is structurally sound, properly sloped, and safe to work on. Shingle installation is not only about nailing materials in place; it also depends on deck condition, ventilation, flashing, drainage, and local code requirements. If you are unsure about roof pitch, deck rot, existing layers, or fall protection, hire a qualified roofing contractor rather than treating an architectural shingles installation video as a complete substitute for professional judgment.
Prepare these items before beginning:
- Architectural shingles, starter strip shingles, and matching ridge caps
- Underlayment, ice and water shield where required, and drip edge
- Roofing nails of the correct length and corrosion resistance
- Flashing for walls, chimneys, skylights, valleys, and penetrations
- Roofing cement or approved sealant for limited detail areas
- Chalk line, tape measure, utility knife, hammer or roofing nailer
- Ladder, roof brackets, harness, footwear with grip, and debris protection
- Dumpster, tarp, broom, magnetic nail sweeper, and cleanup tools
Check manufacturer instructions for the exact product you use. GAF architectural shingles installation details, for example, may differ from another manufacturer’s instructions for nail placement, exposure, starter layout, or warranty requirements. Following the product guide is one of the most important roofing tips because even strong shingle types can fail if they are installed outside specifications.
Follow these steps to lay architectural shingles
The process below describes a standard approach for a sloped roof. It is not a substitute for site-specific engineering, code review, or manufacturer instructions, but it gives you the practical order of work and the issues to watch while you install shingles.
- Inspect the roof and confirm the slope. Start by verifying that the roof is appropriate for architectural shingles. Look for sagging areas, soft decking, poor ventilation, damaged rafters, or old water stains inside the attic. If the roof is low-slope or flat, stop and have it evaluated for a flat roof membrane system instead, because shingles can trap water when there is not enough pitch.
- Remove old roofing and expose the deck. Tear off old roofing shingles, felt, loose nails, damaged flashing, and deteriorated materials. A clean deck lets you see rot, delamination, gaps, and uneven areas that would compromise the new roofing installation. Do not install architectural shingles over hidden damage; covering weak decking may save time at first but often leads to leaks, nail pops, and premature failure.
- Repair the roof deck before covering it. Replace rotted plywood, secure loose sheathing, and make sure the surface is flat enough for proper shingle alignment. Nails need a firm base to hold, and architectural shingles need even support to lie correctly. This is also the right time to address ventilation problems, because poor airflow can shorten the life of shingle roofing and contribute to heat and moisture buildup.
- Install drip edge and water-protection layers. Install metal drip edge along the eaves and rakes as required for your roof assembly. Apply ice and water shield in vulnerable areas such as eaves, valleys, sidewalls, chimneys, skylights, and roof penetrations. Then install underlayment across the roof deck with proper overlaps so wind-driven rain has a second line of defense beneath the architectural shingles.
- Lay out clean reference lines. Snap chalk lines to keep courses straight and consistent across the roof. Architectural shingles have a thicker, dimensional profile, so small alignment errors can become more visible as you move upward. Good layout also helps you avoid narrow pieces at edges and keeps the finished architectural roofing pattern balanced.
- Install starter shingles at the eaves and rakes. Starter strips provide the seal and backing needed at the roof edges. Position them according to the manufacturer’s exposure and overhang requirements, then fasten them securely. Avoid using cut-up field shingles unless the product instructions allow it, because incorrect starter installation can leave edge seams vulnerable to wind uplift and water intrusion.
- Set the first course carefully. Place the first row of architectural shingles over the starter strip and align it with your chalk line. Fasten each shingle in the designated nail zone, using the correct number of nails for the roof slope and wind requirements. Nails should sit flush, not angled, overdriven, or underdriven, because bad fastening is one of the most common causes of shingle failure.
- Stagger the seams as you work upward. Continue laying courses across the roof, offsetting joints as directed by the shingle manufacturer. Proper staggering prevents vertical seam channels that can invite water movement beneath the roofing shingles. Keep checking alignment every few rows; it is easier to correct a slight drift early than to hide a crooked pattern near the ridge.
- Flash valleys, walls, and penetrations correctly. Valleys and flashing areas are where many roof leaks begin. Use the correct open valley, closed valley, step flashing, counterflashing, pipe boot, or chimney detail for the roof design. Do not rely on roofing cement as the main waterproofing method; sealant is a detail aid, not a replacement for proper metal flashing and shingle integration.
- Cut shingles neatly at edges and obstructions. Trim shingles with a sharp blade so they fit cleanly around vents, sidewalls, skylights, and roof edges. Leave the spacing required by the manufacturer where shingles meet vertical surfaces or accessories. Ragged cuts, tight joints, or exposed fasteners can create weak points, especially through freeze-thaw cycles and heavy rain.
- Install ridge caps and finish ventilation details. Once both roof planes are complete, install ridge vent if the roof system uses it, then cap the ridge with approved ridge cap shingles. Fasten each cap in the correct location so the next cap covers the nails. The ridge is highly exposed to wind, so do not rush this final stage of the installation of architectural shingles.
- Inspect, clean, and document the work. Walk the roof carefully and check for exposed nails, lifted tabs, damaged shingles, loose flashing, or uneven courses. Clean gutters, remove debris, and use a magnetic sweeper around the property to collect nails. Taking photos of key details can be helpful for records, warranties, and future maintenance.
Avoid common installation mistakes
Architectural shingles are forgiving in appearance, but they are not forgiving when water details are wrong. Many problems come from skipping preparation, using the wrong fastener pattern, or assuming all shingle types install the same way. Treat product instructions as the controlling guide, especially when using premium laminated shingles or specific systems such as GAF architectural shingles installation.
Common mistakes to avoid include:
- Installing shingles on a flat or very low-slope roof
- Leaving old rotten decking in place
- Reusing damaged flashing around chimneys or walls
- Nailing above, below, or outside the manufacturer’s nail zone
- Overdriving nails with a pneumatic nailer
- Creating repeated vertical seams between courses
- Skipping starter strips or using the wrong ridge cap
- Depending on caulk instead of correct flashing
- Ignoring attic ventilation and moisture issues
If you are comparing architectural shingles installation cost, remember that low bids sometimes leave out tear-off, deck repair, flashing replacement, ventilation work, or cleanup. A realistic roof installation estimate should describe the scope clearly, not just give a single number for materials and labor.
Flat roofs need a different waterproofing strategy
On many New York City buildings, especially residential brownstones and commercial properties, the roof is flat or nearly flat. These roofs do not shed water the way pitched shingle roofing does. Because there is limited natural slope, even a small drainage problem can create ponding water that stresses seams, flashing, penetrations, and old roof layers.
RH Renovation LLC works as a Flat Roof expert New York property owners can call for flat roof systems rather than forcing roofing architectural shingles installation onto the wrong roof type. In NYC boroughs, flat roof leaks often come from worn membranes, failed flashing, clogged drains, poor slope, damaged skylight curbs, or old patchwork. Precise waterproofing matters because the roof must resist standing water, freeze-thaw movement, UV exposure, foot traffic, and building movement.
Durable flat roof technologies used by RH Renovation in NYC include:
- TPO and PVC thermoplastic single-ply membranes: These systems create a continuous waterproof surface with heat-welded seams. They are commonly selected for energy-conscious and commercial flat roof applications because the membrane can provide strong seam performance and dependable water resistance when installed correctly.
- EPDM rubber: EPDM Rubber is a long-lasting synthetic rubber membrane known for flexibility and durability. It is resilient to UV radiation and can withstand intense winter weather, making it a practical option for many flat roof conditions.
- APP and Modified Bitumen systems: APP / Modified Bitumen is an asphalt-based multi-layer system that provides thick, durable physical protection. It is often suitable for high-traffic roofs, older structures, and buildings that benefit from a robust layered roof surface.
Understand 2026 NYC flat roof pricing before you plan
Based on 2026 New York City market pricing ranges supplied for flat roof projects, costs depend on roof access, size, existing layers, material choice, drainage conditions, flashing details, and whether damaged substrate must be replaced. Minor repair work is very different from full replacement, so it helps to separate the type of project before comparing quotes.
Typical NYC pricing ranges include:
- Minor leak and patch repairs: $400 to $1,200, depending on access, leak location, membrane condition, and how much surrounding material must be opened or sealed.
- Flashing and drainage adjustments: $450 to $900, often involving roof edges, parapet walls, pipe penetrations, scuppers, drains, or small slope corrections.
- Full flat roof replacement: $6 to $16 per square foot, depending on material choice, such as EPDM versus premium PVC, and whether the project needs new insulation or rotted plywood decking replacement.
These flat roof numbers are separate from architectural shingles installation cost on a pitched roof. If your building has both sloped and flat sections, ask the contractor to price each system separately so you can see where the budget is going.
Schedule the right next step
If your roof is pitched and suitable for architectural shingles, the next step is a detailed inspection, product selection, and written scope for shingle installation. If your roof is flat, the smarter next step is a waterproofing assessment rather than a shingle estimate. In either case, the goal is to match the roofing system to the building, not to install the same material everywhere.
RH Renovation LLC offers free onsite estimates and an online quote request option for New York City property owners. For flat roofs, ask about a core sample test of the existing flat roof layer so the contractor can understand what is already on the building before recommending repair, overlay, or replacement. That small investigation can reveal old membranes, trapped moisture, insulation conditions, and layer buildup that are impossible to judge from the surface alone.