DIY Chimney Inspection: How to do it Yourself
DIY Chimney Inspection: A Homeowner’s Safety Checklist and Step-by-Step Guide
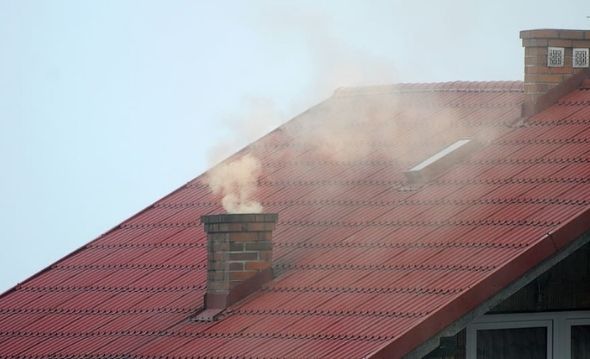
Your chimney plays an important role in keeping your home safe by directing smoke, combustion gases, and other byproducts away from your living space. However, like other exterior parts of a property, it can develop problems over time. Cracked masonry, damaged flashing, loose chimney caps, and water leaks can gradually affect its condition.
That is why understanding how to perform a DIY chimney inspection can be useful for homeowners. A simple visual check allows you to identify potential warning signs early, monitor visible deterioration, and understand when professional attention may be necessary.
However, there is an important distinction between checking your chimney yourself and having it professionally inspected. You can examine accessible exterior areas and visible fireplace components, but hidden flue damage, creosote accumulation, liner deterioration, and ventilation problems require appropriate professional inspection methods.
In this guide, RH Renovation explains how to perform a basic chimney inspection safely, what warning signs to look for, which maintenance tasks homeowners can handle, and when to contact a professional.
Why Should You Inspect Your Chimney Regularly?
Chimney problems do not always become obvious immediately. A small crack in the exterior masonry, for example, may allow moisture to enter the structure. Over time, repeated exposure to rain, freezing temperatures, and seasonal weather changes can contribute to further deterioration.
Regular visual checks help homeowners recognize these issues before they develop into more extensive repair requirements.
There are several reasons to pay attention to your chimney’s condition.
Prevent water damage: Damaged chimney crowns, deteriorated mortar joints, and failing flashing can allow water to enter areas that should remain protected.
Identify structural deterioration: Loose bricks, visible cracks, and leaning masonry can indicate problems that require professional assessment.
Recognize potential fire hazards: Excessive creosote, damaged flue liners, and obstructions can create serious safety concerns.
Protect your roof: Damaged flashing and chimney connections can become sources of roof leaks.
Plan maintenance earlier: Identifying visible problems allows you to arrange appropriate repairs before deterioration becomes more extensive.
The Chimney Safety Institute of America recommends having chimneys, fireplaces, and vents professionally inspected at least once a year, with cleaning and maintenance performed when necessary.
A homeowner’s visual inspection should supplement, not replace, this annual professional assessment.
What Do You Need for a DIY Chimney Inspection?
Before beginning, gather a few basic items for checking safely accessible areas of your chimney.
You may need:
- A bright flashlight for examining visible fireplace components.
- Binoculars for observing the chimney from ground level.
- A smartphone or camera to document visible damage.
- A notebook to record maintenance concerns.
- A dust mask and gloves if handling ordinary household dust around the fireplace.
Avoid climbing onto the roof, removing chimney components, opening sealed access points, or using tools to probe the flue.
If an inspection requires roof access, specialized equipment, or entry into restricted areas, arrange professional assistance instead.
Step-by-Step Guide to a DIY Chimney Inspection
Step 1: Examine the Chimney Exterior From Ground Level
Start by observing the outside of your chimney from a safe position.
Look at the visible masonry, brickwork, and overall alignment. Pay particular attention to areas where the chimney meets the roof because these locations can experience weather exposure and movement.
Check for:
- Cracks in exterior bricks or stone.
- Missing or deteriorating mortar.
- Loose or visibly displaced masonry.
- Sections that appear to lean or separate from the building.
- Unusual discoloration or moisture staining.
Small surface imperfections do not necessarily indicate a serious structural problem. However, widening cracks, loose bricks, and noticeable movement should be evaluated by a qualified professional.
Take photographs of any concerning areas so you can compare their condition during future maintenance checks.
Step 2: Check the Chimney Cap and Visible Top Components
A chimney cap helps prevent rain, animals, leaves, and other debris from entering the chimney.
Observe the chimney top from the ground using binoculars if necessary. Look for signs that the cap is missing, displaced, damaged, or visibly corroded.
Also pay attention to signs of bird activity or vegetation around the chimney opening.
A damaged or missing cap can increase exposure to moisture and debris. If you suspect a problem, arrange a professional assessment rather than attempting to access the chimney top yourself.
Step 3: Look for Chimney Crown Damage
The chimney crown is the protective surface at the top of a masonry chimney. It helps direct water away from the chimney structure.
When the crown develops cracks or deteriorates, water may penetrate the masonry and contribute to damage.
From a safe viewing position, look for:
- Visible cracks.
- Missing sections.
- Deteriorated edges.
- Signs of water penetration.
- Areas that appear uneven or damaged.
Do not assume that a small visible crack is harmless. A professional should determine whether the crown needs repair, resurfacing, or replacement.
Step 4: Inspect the Chimney Flashing
Chimney flashing is installed where the chimney passes through the roof. Its purpose is to create a weather-resistant connection between the roof covering and the chimney structure.
Damaged flashing is a common source of roof leaks.
Look for visible warning signs from the ground or another safe viewing position, including:
- Metal flashing that appears lifted or displaced.
- Visible gaps around the chimney base.
- Rust or corrosion.
- Water staining on nearby roof surfaces.
- Interior ceiling stains close to the chimney.
Also check the surrounding attic or upper-floor areas if they are safely accessible. Look for damp insulation, discoloration, or signs of moisture near the chimney penetration.
If you notice these problems, have the flashing and surrounding roofing inspected before water damage spreads.
Step 5: Examine the Fireplace and Firebox
Once the fireplace is completely cold and has not been recently used, you can perform a basic visual check of the firebox.
Use a flashlight to examine the visible brickwork, mortar joints, and surrounding surfaces.
Look for:
- Cracked or missing firebrick.
- Crumbling mortar.
- Loose masonry.
- Unusual dark staining.
- Signs of moisture.
- Visible debris or animal activity.
Pay attention to the condition of the fireplace opening and hearth as well.
Do not attempt to remove damaged firebricks or repair internal masonry yourself. These components must be suitable for the temperatures and conditions associated with fireplace operation.
Step 6: Look at the Damper and Visible Smoke Chamber
The damper controls airflow between the fireplace and chimney. It should move properly and allow the fireplace to vent when operated according to the appliance manufacturer’s instructions.
If the fireplace is completely cold, check whether the damper can be operated normally without forcing it.
Look for visible rust, corrosion, unusual staining, or obvious mechanical damage.
You may also notice soot or deposits around the visible smoke chamber area.
However, a visual check cannot establish whether the entire smoke chamber or flue is free from damage, deposits, or obstructions.
Do not insert tools or reach into hidden chimney areas to investigate further. A qualified chimney professional can examine these components using suitable inspection equipment.
Step 7: Check for Moisture and Water Damage
Water is one of the most common threats to masonry chimneys.
It can enter through damaged crowns, deteriorated flashing, missing caps, and weakened mortar joints.
Inside your home, check the areas surrounding the fireplace and chimney for:
- Brown or yellow ceiling stains.
- Damp patches on nearby walls.
- Peeling paint or damaged plaster.
- Musty odors.
- White powdery deposits on masonry.
- Visible moisture around the fireplace.
White deposits, sometimes called efflorescence, can indicate moisture moving through masonry.
These signs do not always reveal the exact source of the problem, but they are useful indicators that further investigation may be necessary.
Step 8: Document Your Findings
After completing your visual checks, record anything unusual.
Take photographs, note the location of visible damage, and include the date of your inspection.
For example, if you notice a crack in the chimney masonry, record whether it appears to have changed since your previous observation.
This information can help a professional understand the history of the problem and recommend the appropriate next steps.
Remember that photographs and visual observations cannot confirm the internal safety of your chimney.
Warning Signs That Require Professional Attention
Some chimney problems should never be ignored. If you notice any of the following conditions, stop using the fireplace or connected appliance until it has been professionally evaluated.
Visible structural cracks: Large or widening cracks, loose bricks, and leaning masonry may indicate structural deterioration.
Damaged flue liner: Cracked or missing flue tiles can prevent the chimney from safely containing and directing combustion gases.
Excessive creosote deposits: Creosote is a highly flammable byproduct of burning wood. Significant accumulation increases the risk of a chimney fire.
Water entering the chimney: Persistent leaks can damage masonry, metal components, and surrounding building materials.
Smoke entering the room: Smoke escaping into living spaces may indicate a blockage, draft problem, or other venting issue.
Unusual odors: Strong or persistent chimney odors can indicate moisture, deposits, or other conditions that need investigation.
If a carbon monoxide alarm activates, leave the building immediately and contact emergency services from a safe location. Do not re-enter until the property has been declared safe.
If you suspect a chimney fire, call emergency services. Do not attempt to inspect or restart the chimney yourself.
How Often Should You Inspect Your Chimney?
Homeowners can perform occasional visual checks throughout the year, particularly after severe weather or when visible deterioration is suspected.
However, a professional chimney inspection should be arranged at least once a year, following CSIA and NFPA 211 guidance.
You should also arrange an appropriate inspection when:
- You have experienced a chimney or fireplace fire.
- You notice smoke or unusual operating problems.
- Severe storms may have damaged the chimney.
- You purchase a home with an existing fireplace.
- You change the heating appliance or fuel type.
- You plan to make significant changes to the chimney or venting system.
The inspection level depends on the circumstances.
A Level 1 inspection is generally appropriate when the chimney continues to be used in the same way and no significant changes or problems have occurred.
A Level 2 inspection may be necessary when changing appliances, changing fuel types, selling or purchasing a property, or investigating suspected damage. It generally includes a more detailed examination, including an internal video inspection where required.
DIY Chimney Inspection vs. Professional Chimney Inspection
Understanding the difference helps you avoid relying on a visual check for problems that may be hidden inside the structure.
| Inspection area | Homeowner visual check | Professional inspection |
|---|---|---|
| Exterior brickwork | Visible cracks and damage | Detailed condition assessment |
| Chimney cap | Visible displacement or damage | Component condition and installation |
| Chimney crown | Visible deterioration | Detailed evaluation and repair recommendations |
| Roof flashing | Visible warning signs | Closer examination of waterproofing connections |
| Firebox | Accessible visible surfaces | Detailed assessment of firebox condition |
| Flue liner | Not fully assessable | Appropriate internal inspection |
| Creosote | May notice visible deposits | Professional evaluation and cleaning |
| Blockages | Some visible warning signs | Appropriate assessment of the venting system |
A professional inspection provides a more complete understanding of the chimney’s condition and helps identify defects that cannot be detected through ordinary visual observation.
Common Chimney Inspection Mistakes Homeowners Should Avoid
Even well-intentioned maintenance can become dangerous when homeowners attempt tasks beyond their experience.
Climbing onto the roof without proper equipment: Roof inspections can involve significant fall risks. Use ground-level observations and arrange professional access when necessary.
Assuming a clean fireplace means a safe chimney: A clean-looking firebox does not prove that the flue liner is intact or that the chimney is free from hidden defects.
Ignoring small water stains: Minor moisture marks can indicate a developing roof or chimney leak.
Using chemical chimney cleaners as a replacement for inspection: Cleaning products cannot replace mechanical cleaning and a complete evaluation by a qualified professional.
Attempting DIY chimney repairs: Damaged crowns, flashing, masonry, and flue components require appropriate materials and installation methods.
The safest approach is to use DIY checks for early warning signs and leave technical inspection and repairs to qualified professionals.
When Should You Contact RH Renovation for Chimney Repair?
Identifying visible chimney damage is only the first step. Once you notice deterioration, it is important to understand its cause and determine the appropriate repair.
RH Renovation provides residential exterior renovation services for homeowners in the Bronx and Westchester.
Our exterior improvement services include chimney repair, roofing, gutters, siding, and skylight-related work.
If your visual inspection reveals damaged chimney masonry, deteriorated exterior components, or potential problems with the chimney-to-roof connection, professional evaluation can help establish the next steps.
Depending on the condition of your property, addressing chimney damage may involve masonry repairs, chimney crown work, flashing improvements, or related exterior renovation.
Our goal is to help homeowners maintain the condition and weather protection of their properties through appropriate exterior improvement solutions.
Need help with your chimney?
Contact RH Renovation at (646) 818-4305 or request a free estimate to discuss your chimney repair or exterior renovation project.
Frequently Asked Questions About DIY Chimney Inspection
Can I inspect my chimney myself?
You can perform a basic visual inspection of safely accessible exterior areas and visible fireplace components. However, you cannot fully evaluate hidden flue damage, internal creosote accumulation, or the overall safety of the venting system without appropriate professional inspection.
How often should a chimney be inspected?
The Chimney Safety Institute of America follows NFPA 211 guidance recommending that chimneys, fireplaces, and vents be inspected at least once a year. Cleaning and repairs should be performed when necessary.
What are the signs that a chimney needs repair?
Common warning signs include cracked bricks, deteriorating mortar, damaged flashing, a cracked chimney crown, water stains, loose masonry, and unusual chimney odors.
Can a damaged chimney cause roof leaks?
Yes. Damaged flashing, deteriorated crowns, and gaps around the chimney can allow rainwater to enter the roof structure. If you notice water stains near your fireplace or chimney, arrange a professional assessment.
Is it safe to clean a chimney myself?
Chimney cleaning involves more than removing visible soot. Creosote deposits, hidden obstructions, and internal chimney conditions require appropriate equipment and experience. Professional cleaning is recommended to ensure the venting system is properly evaluated.
What happens during a professional chimney inspection?
A professional inspection evaluates accessible chimney and fireplace components, checks for damage and obstructions, and determines whether cleaning or repairs are necessary. More detailed inspections may involve specialized tools and internal video scanning.
Should I inspect my chimney after a storm?
Yes. Strong winds, heavy rain, and severe weather can damage chimney caps, masonry, crowns, and roof flashing. Perform a safe visual check from the ground and arrange professional assistance if you notice any damage.
Final Thoughts
A DIY chimney inspection is a useful way to become more familiar with your home’s exterior and identify visible maintenance concerns. Checking the masonry, chimney cap, crown, flashing, fireplace, and surrounding areas can help you recognize potential problems before they become more extensive.
However, visual observations cannot confirm that the internal chimney structure is safe for continued use. Annual professional inspections remain essential for identifying hidden defects, creosote accumulation, and other potentially dangerous conditions.
If you discover chimney damage or signs of water intrusion, do not delay getting the problem evaluated.
For chimney repair and exterior renovation services in the Bronx and Westchester, contact RH Renovation at (646) 818-4305 and discuss your project with our team.
If you notice anything out of the ordinary, it is best to call a professional to repair the issue. While DIY chimney inspection is definitely advised, DIY repairs may not be completely safe neither for you nor for the structure of your home.
At RH Renovation NYC we can offer proper chimney cleaning and repair as an extension of your DIY chimney inspection. Contact us and we will provide you with a free quote on the works needed on your home.