

That puddle of water pooling next to your house every time it rains isn’t just a muddy mess—it’s a foundation problem waiting to happen. According to home inspection experts, uncontrolled roof runoff is a leading cause of costly foundation damage. A properly installed rain gutter downspout is your home’s most effective defense, guiding that water safely away.
While it might seem like a job for a professional, a DIY downspout installation is a manageable and satisfying project. With the right instructions, you can boost your home’s curb appeal and protect its value in a single afternoon. This guide provides the exact steps how to install rain gutter downspout drainage solution.
Your Complete Tool and Materials Checklist
A successful DIY project starts with having everything on hand. For downspouts, your main material choice is between vinyl and aluminum. Vinyl is lightweight and easy to cut with a hacksaw, making it a great choice for first-timers. Aluminum is more rigid, stands up better to ladders and impacts, and often comes in more colors.
Gather your tools and materials using these checklists to avoid extra trips to the hardware store.

Essential Tools
- Drill with a 1/8″ bit and a 1/4″ hex head driver
- Tape measure & pencil
- Hacksaw (or tin snips for aluminum)
- Sturdy ladder
- Safety glasses & gloves
- Caulk gun
Project Materials
- Downspout sections (typically 10-foot lengths)
- Gutter Outlet: The piece that fits into your gutter to start the downspout.
- Elbows: Angled pieces for making turns. You will likely need both types.
- Downspout Straps: Brackets to secure the downspout to the wall.
- Gutter screws (short, self-tapping screws)
- Gutter sealant (comes in a tube for your caulk gun)
- Splash block or extender for the bottom
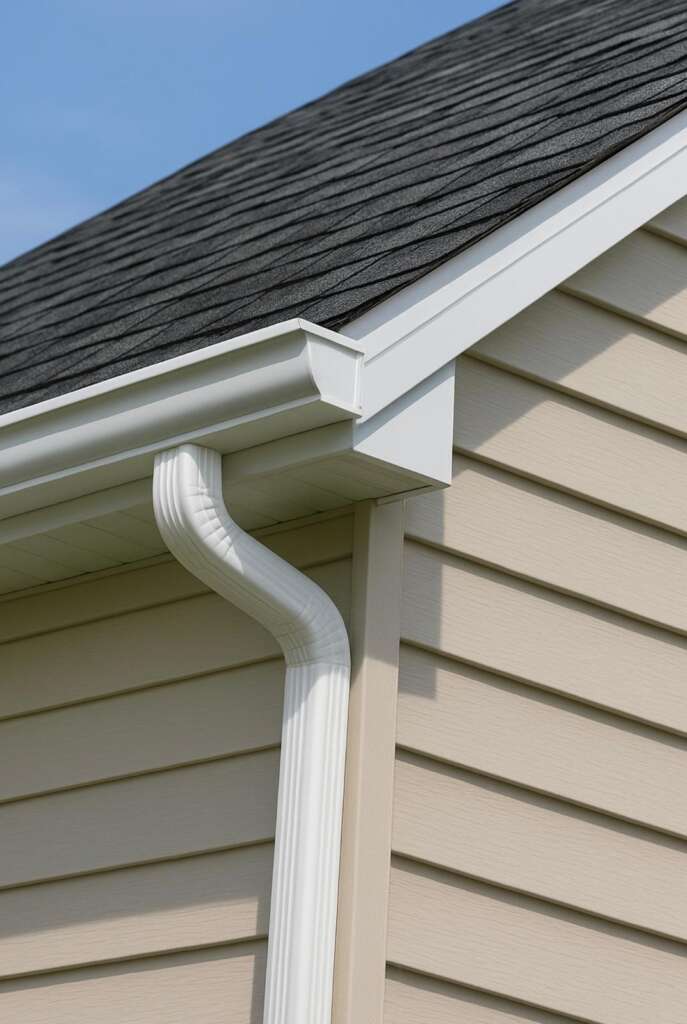
The most confusing parts are often the elbows, which come in two types: “A-style” and “B-style.” Here’s the simple difference: A-style elbows turn front-to-back, like turning from the gutter outlet toward the wall. B-style elbows turn side-to-side. You’ll use a combination of these to create the S-shape needed to bring the spout from the overhanging gutter flush against your house wall.
Where to Place Your Downspout for Maximum Protection
Before drilling, map out the perfect spot. The general rule is to install one downspout for every 40 feet of gutter. Any roofline longer than that needs more than one to prevent the gutter from overflowing during a downpour.
The corners of a house are almost always the best location. This offers maximum stability, letting you fasten the spout securely to two walls, which helps it stand up to wind and storms. For this to work, your horizontal gutter must have a slight slope—about a half-inch for every 10 feet—leading down to that corner for proper drainage.
Finally, think about where the water will end up. You must guide it away from the foundation and avoid creating a muddy flowerbed or a slippery walkway. Planning this exit path now helps you choose the right drainage solution for the bottom, like a splash block or a buried extender.
Step 1: Install the Gutter Outlet
The journey from gutter to ground begins with the outlet. Position it on the underside of the gutter where you planned your downspout. Using a permanent marker, carefully trace the inside of the outlet onto the gutter to create a cutting template.
To make the cut, drill a starting hole in aluminum or steel gutters and use tin snips to cut along the line. For vinyl gutters, use a hole saw attachment on your drill that matches the outlet size. In either case, cutting just inside your traced line ensures the outlet’s flange will have a solid surface to sit on.
To create a durable, waterproof connection, apply a generous, continuous bead of gutter sealant around the edge of the hole. Press the outlet firmly into the sealant so its flange is flush against the gutter. Secure it by driving short gutter screws or pop rivets through the pre-drilled holes in the outlet’s flange. Wipe away any excess sealant from inside the gutter.
Step 2: Assemble the Top Offset with Elbows
To bridge the gap from the overhanging gutter to the house, you’ll create a small “Z” shaped jog, called an offset, using two elbows. Start by sliding the first elbow onto the gutter outlet.
To determine the length of the connector piece, hold the second elbow flat against the wall directly below the first one. Measure the distance between the two elbow openings to find the length of the straight piece you’ll need to cut.
Before securing, dry-fit the assembly by putting all pieces together without screws to check alignment. Cut a small piece of downspout to your measured length and connect the two elbows. The most important rule of downspout assembly is that the upper piece must always fit inside the lower piece to prevent leaks.
With the dry-fit complete, make the connection permanent. Secure the top elbow to the connector and the connector to the bottom elbow using two short gutter screws at each seam.

Step 3: Cut, Crimp, and Connect the Main Downspout Sections
With the offset assembled, add the long, straight sections. Measure from the bottom opening of your offset to about one foot above the ground and mark this length on a new downspout piece. For a perfectly straight cut, wrap a piece of paper tightly around the spout, line up its edges, and trace a line as a guide for your hacksaw.
Before joining two pieces, you must crimp the top section so it fits snugly inside the bottom one. Using a downspout crimper tool, squeeze the end of the top section in a few places. This slightly narrows the opening, like squishing the end of a straw to slide it into another one. This step is essential for a watertight seam.

Now, slide the crimped end about 1.5 inches into the uncrimped opening of the section below it. This overlap ensures water bypasses the seam. To make the connection permanent, drive two short gutter screws through the overlapping area—one on each of the wider faces of the downspout. Repeat this process if you need multiple sections to reach the ground.
Step 4: Secure the Downspout to the Wall
With the downspout assembled, anchor it firmly against your house using downspout straps. Hold the downspout against the wall and place a level on its side to ensure it’s perfectly vertical. A plumb downspout not only looks professional but also prevents clogs.
The fastener you use depends on your wall’s surface. For wood or vinyl siding, drive 1.5-inch exterior-grade wood screws directly through the strap’s holes. If securing to brick or concrete, use a hammer drill with a masonry bit to pre-drill a pilot hole, then drive in a masonry screw for a solid hold.
Place one strap near the top, one near the bottom, and another every 6 to 8 feet in between. This spacing prevents rattling in the wind and keeps the spout from sagging.
The Final Step: Guide Water Safely Away from Your Home
To prevent water from eroding your yard, attach one final elbow to the bottom of the downspout and fasten it with two short gutter screws. This turn directs the flow horizontally, away from the foundation.
You have two straightforward drainage solutions. The most common is a splash block, a sturdy pad placed under the opening to break the water’s fall. The other option is a downspout extender, a longer pipe that carries water farther into your yard.
Let your landscape guide your choice. A splash block works for flat ground, but an extender is essential if the ground slopes back toward your house. The non-negotiable rule is to discharge water at least four to six feet away from your foundation.
Common Mistakes to Avoid (And Pro Tips for Success)
Before putting your tools away, a final inspection turns a good job into a great one. Give the entire downspout a gentle shake to ensure it’s secure, and double-check that all screws are snug. This helps you spot and fix common installation mistakes.
Run through this final checklist:
- Check the gutter outlet seal: The connection where the downspout begins must be fully sealed with waterproof caulk.
- Verify section direction: The upper piece must always nest inside the lower piece to prevent leaks at the seams.
- Ensure it’s firmly secured: A wobbly downspout is easily damaged. Add another strap if it feels loose.
The next time it rains, step outside and watch your work in action. Seeing the water flow perfectly from roof to ground, exactly where you intended, is the true reward. You also now have the skills to add a downspout diverter for a rain barrel anytime you choose.